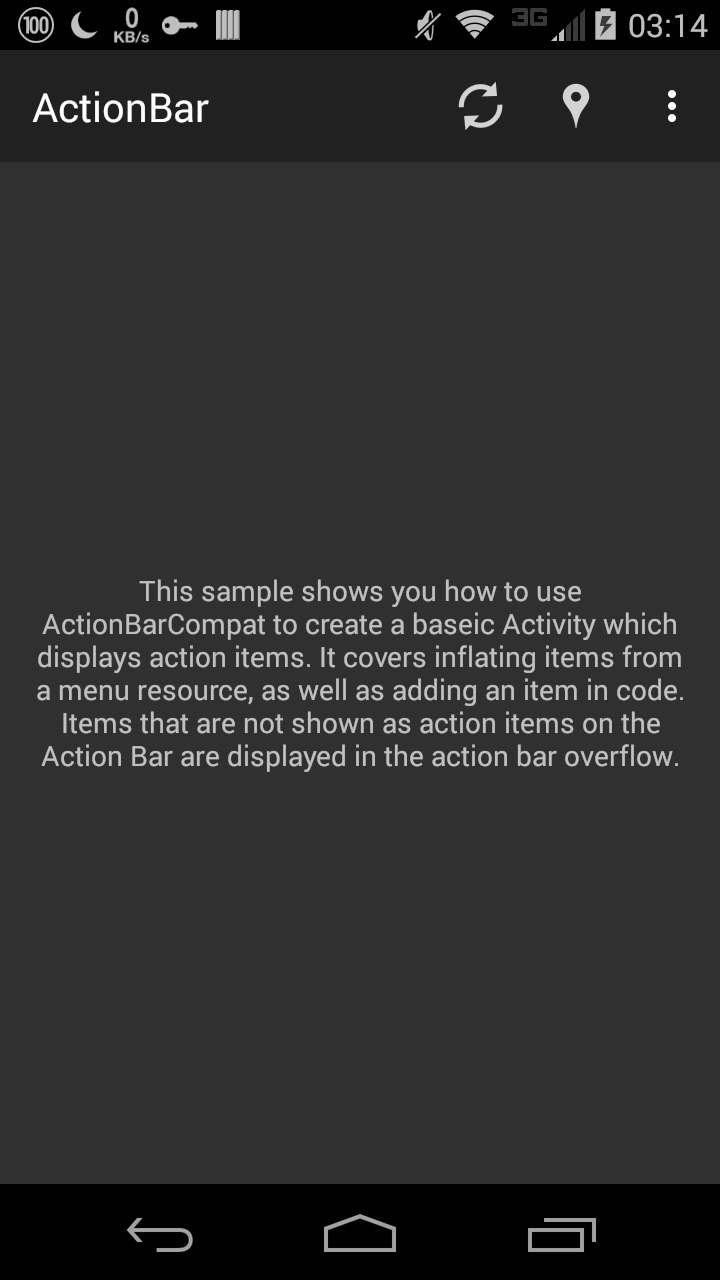
按照 Android Studio 内置的例子做了个 actionbar 的 Demo,现在写下来做笔记,IDE 为 Android Studio v1.2。 完成的截图如下:
AndroidMenifest.xml
1 |
|
String 从截图可看出有一段很长的说明文字,且文字位于中间,长文字可以在用 CDATA 保存,所以写好需要的字符串。 res/values/base-strings.xml:
1 |
|
res/values/strings.xml
1 |
|
Activity UI 因为只有一段说明文字,所以一个 android:gravity="center" 属性处理,并且设置 android:layout_width="match_parent" 和 android:layout_height="match_parent"。 为了看起来更舒服,所以加了个 android:padding="16dp" 属性。 _res/layout/sample_main.xml_
1 |
|
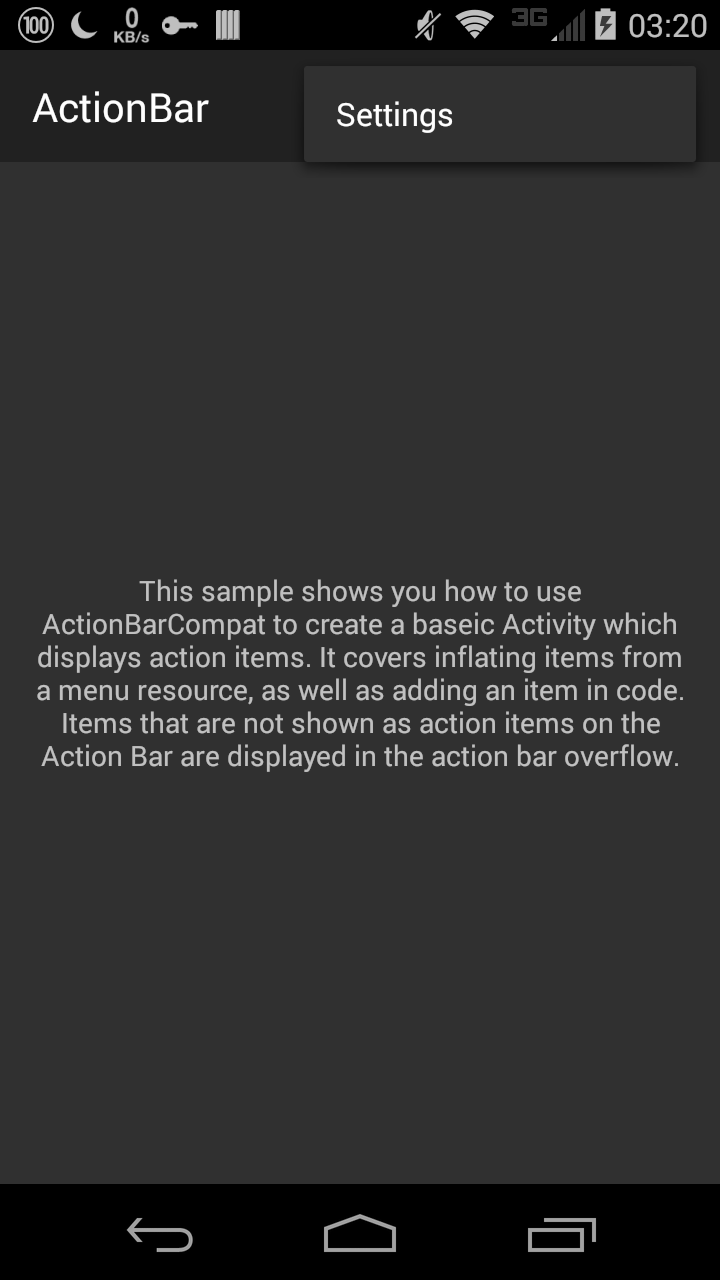
Menu 事实上 Location 项是打算通过 Activity 的 onCreateOptionsMenu() 来创建,所以现在只写两个 <item>。 基本的属性都定义好,包括 android:id、android:icon、android:title。 showAsAction 需要使用不同的命名空间,这里用 support 表示,ifRoom 表示有空间就显示,never 表示永远不显示,也就是点击那个菜单汉堡包才显示。 res/menu/main.xml
1 |
|
MainActivity 动态创建 Location Item 创建 Menu Item 会用到 MenuItem 类 和 Menu 类,先导入:
1 | import android.view.MenuItem; |
用到在
Menu 类中的方法是:
1 | public abstract MenuItem add (int groupId, int itemId, int order, CharSequence title); |
- groupId 代表组概念,如果想对 Item 进行分组管理这个会用得上,如果该 Item 不在组内则使用 None。
- itemId 代表 Item 的 ID,必须是独一无二的,如果不需要 itemID 则使用 None。
- orderId 代表 Item 所在的顺序,注意是在动态创建 Item 中的顺序,如果不需要,使用 None。
- title 表示 Item 的 android:title 属性。 不过得事先写一个独一无二的
ID 供 Item 创建调用: res/values/ids.xml
1 |
|
动态创建代码如下:
1 |
|
其实转为 XML 也就是:
1 | <item android:id="@+id/menu_location" |
Item 分别处理 这里重写的方法是 onOptionItemSeleted(MenuItem item),通过 item.getItemid() 识别所选的 Item。 可以用 Toast 类 makeText() 方法弹出提示现在点击的是哪个 Item,使用方法是:
1 | Toast.makeText(context, text, duration).show(); |
以下是代码实现:
1 |
|
全部
Activity 代码如下: java/co/youngdze/startup/MainActivity.java
1 | package co.youngdze.startup; |